
By Eric Wiebe, NC State Extension Master GardenerSM volunteer of Durham County

Example of a drip irrigation line with built-in emitters on a garden bed at the Briggs Avenue Community Garden. (Image credit: Eric Wiebe)
Drip Irrigation and Its Advantages
Drip, or micro-irrigation, is the low volume, targeted application of water to plants through a network of plastic pipes and water emitters. Though it sounds complicated, it is easy to purchase and install. Originally designed and used by commercial field and greenhouse growers, systems and supplies are now readily available for homeowners. Systems can be easily modified and extended as your garden grows.
While drip is particularly popular in Western states with dry climates and water restrictions, it is also ideal for here in NC. Water is still a precious, costly resource and drip irrigation is a way to help your plants thrive with efficient use.
Odd-shaped and narrow strips of planting beds are easily watered with drip. Sloped surfaces, where most overhead watering runs off and is wasted, are also not a problem for drip. The low water flow means the majority of the water soaks into the soil and is retained rather than running off.
Drip irrigation, when designed properly, can exceed 90 percent efficiency (i.e., only 10 percent of the water runs off or evaporates before absorption). On the other hand, a sprinkler system is at best 50 to 70 percent efficient. I don’t need to visualize for you the typical sprinkler which is sending water running into the storm drains and soaking your neighbors as they walk by on the sidewalk. Drip also helps solve the problem of mildew on your fence and house siding caused by sprinkler wetting.
A steady, low-volume application maintains a desirable balance of air and water in the soil and minimizes the extreme wet-to-dry fluctuations you get with sprinklers or hand watering. These qualities tend to promote healthier plant growth. Combined with a water flow controller, you can customize your watering schedule to minimize water stress while not wasting water.
Components of Drip Irrigation Systems
Tubing
The backbone of a drip irrigation system will be made up of flexible plastic tubing that, when cared for, can last for 10-20 years. A larger drip irrigation system might have up to three different tubing diameters–3/4″ tubing for the main lines getting out to the planting beds, 1/2″ tubing for running through the planting beds, and 1/4″ lines for running from the 1/2″ tubing line to specific plants or planters. The typical rule of thumb is that the longer the distance you are taking the water, the larger the diameter the tubing you need to overcome the loss of water pressure due to ‘friction’ in the line.
For many homeowners, the distance to the planting beds is short enough they can dispense with the 3/4″ line altogether. The general rule of thumb is to limit a 1/4” line run to 20 ft, and a 1/2” line run to 200 ft. Longer runs can use a 3/4” line out to the beds or multiple 1/2” lines off of a 3/4” or 1/2” line. It is important not to try and overcompensate for a long run of tubing by turning the hose bib on all the way, as drip irrigation lines are supposed to run at lower pressures and abnormally high pressure may blow out a connection or emitter.
A 3/4″ supply line is often buried under the ground between the water source and the planting bed(s), but the 1/2″ line which contains the drip emitters is typically run right on the ground or under mulch and held down with wire U-shaped landscape staples. A 1/4″ line is very flexible and can be snaked up the side of planters or porch columns up to hanging baskets. Simple in-line on-off valves can be inserted in the line to shut off sections of the irrigation when nothing is being grown for a season in a bed.

External (far left) and internal (middle) connectors/couplers for 1/2” drip tubing. (Far right) A sleeve-like part that looks like two conjoined circles crimps closed the end of a tube line run. (Image credit: Eric Wiebe)
Emitters
The workhorse of your system is likely to be the 1/2″ tubing containing the emitters. Emitters come in many different designs and can be mixed and matched, depending on your bed design and watering needs. The two key specifications for emitters are the flow rate, expressed in gallons per hour (GPH), and spacing–how far apart are the emitters. Better emitters are pressure compensating (deliver the same rate of water across a range of line pressures) and utilize turbulent flow within a small internal diaphragm to resist clogging


Built-in 1 GPH emitters spaced 12” apart on a 1/2” drip tube in a vegetable garden. (Image credit: Eric Wiebe)
The easiest solution for many homeowners is 1/2″ tubing with built-in emitters. For example, if you have a planting bed with regularly spaced vegetables or flowers, you can get tubing with 0.5, 1.0, or 1.5 GPH emitters spaced every 12″ to 18.”
Choosing the Right Emitter
So, what should you get? This will depend on the water needs of your plants, the type of soil you have, and slope of the beds. In more sandy soils, water from the drip tends to go down more than spreading across the bed, whereas for clay soils, the wetting pattern creates a larger circle of moist soil around the emitter and sinks into the ground more slowly. Thus, for clay soils, emitters should be spaced farther apart, have a lower flow rate, and run longer in order to slowly wet deeply into the soil.
For example, in my vegetable garden, which has lighter loamy soil, I have 1.0 GPH emitters spaced every 12.” I run this between 30 to 60 minutes (depending on average outside temperature), three times a week. How much water is this? The math is pretty simple: 30 mins (½ hour) x 1 gallon/hour (1 GPH) x 3 times/week = 1.5 gallons from each emitter each week. I’ve spaced the lines 24” apart and found testing with a moisture meter that I’m providing adequate moisture 4-12” down across the entire width of my 48” bed.

(Left to right) A pressure compensating, anti-clog 1GPH emitter, a simple 1 GPH emitter, a 1 GPH emitter you can connect a 1/4” tube to, and an awl for poking holes for emitter installation. (Image credit: Eric Wiebe)
In our front yard, the densely planted perennial flower bed also has the same design of 24”-spaced emitter lines, but the larger perennial shrubs and trees have a different design. Instead of lines with built-in emitters, blank tubing (i.e., no emitters built in) is run by the drip line of each of the shrubs/trees. Then individual emitters are poked into the tubing at the base of each plant. The barbs on the ends of the emitters poke through the flexible tubing, creating a water-tight fit.

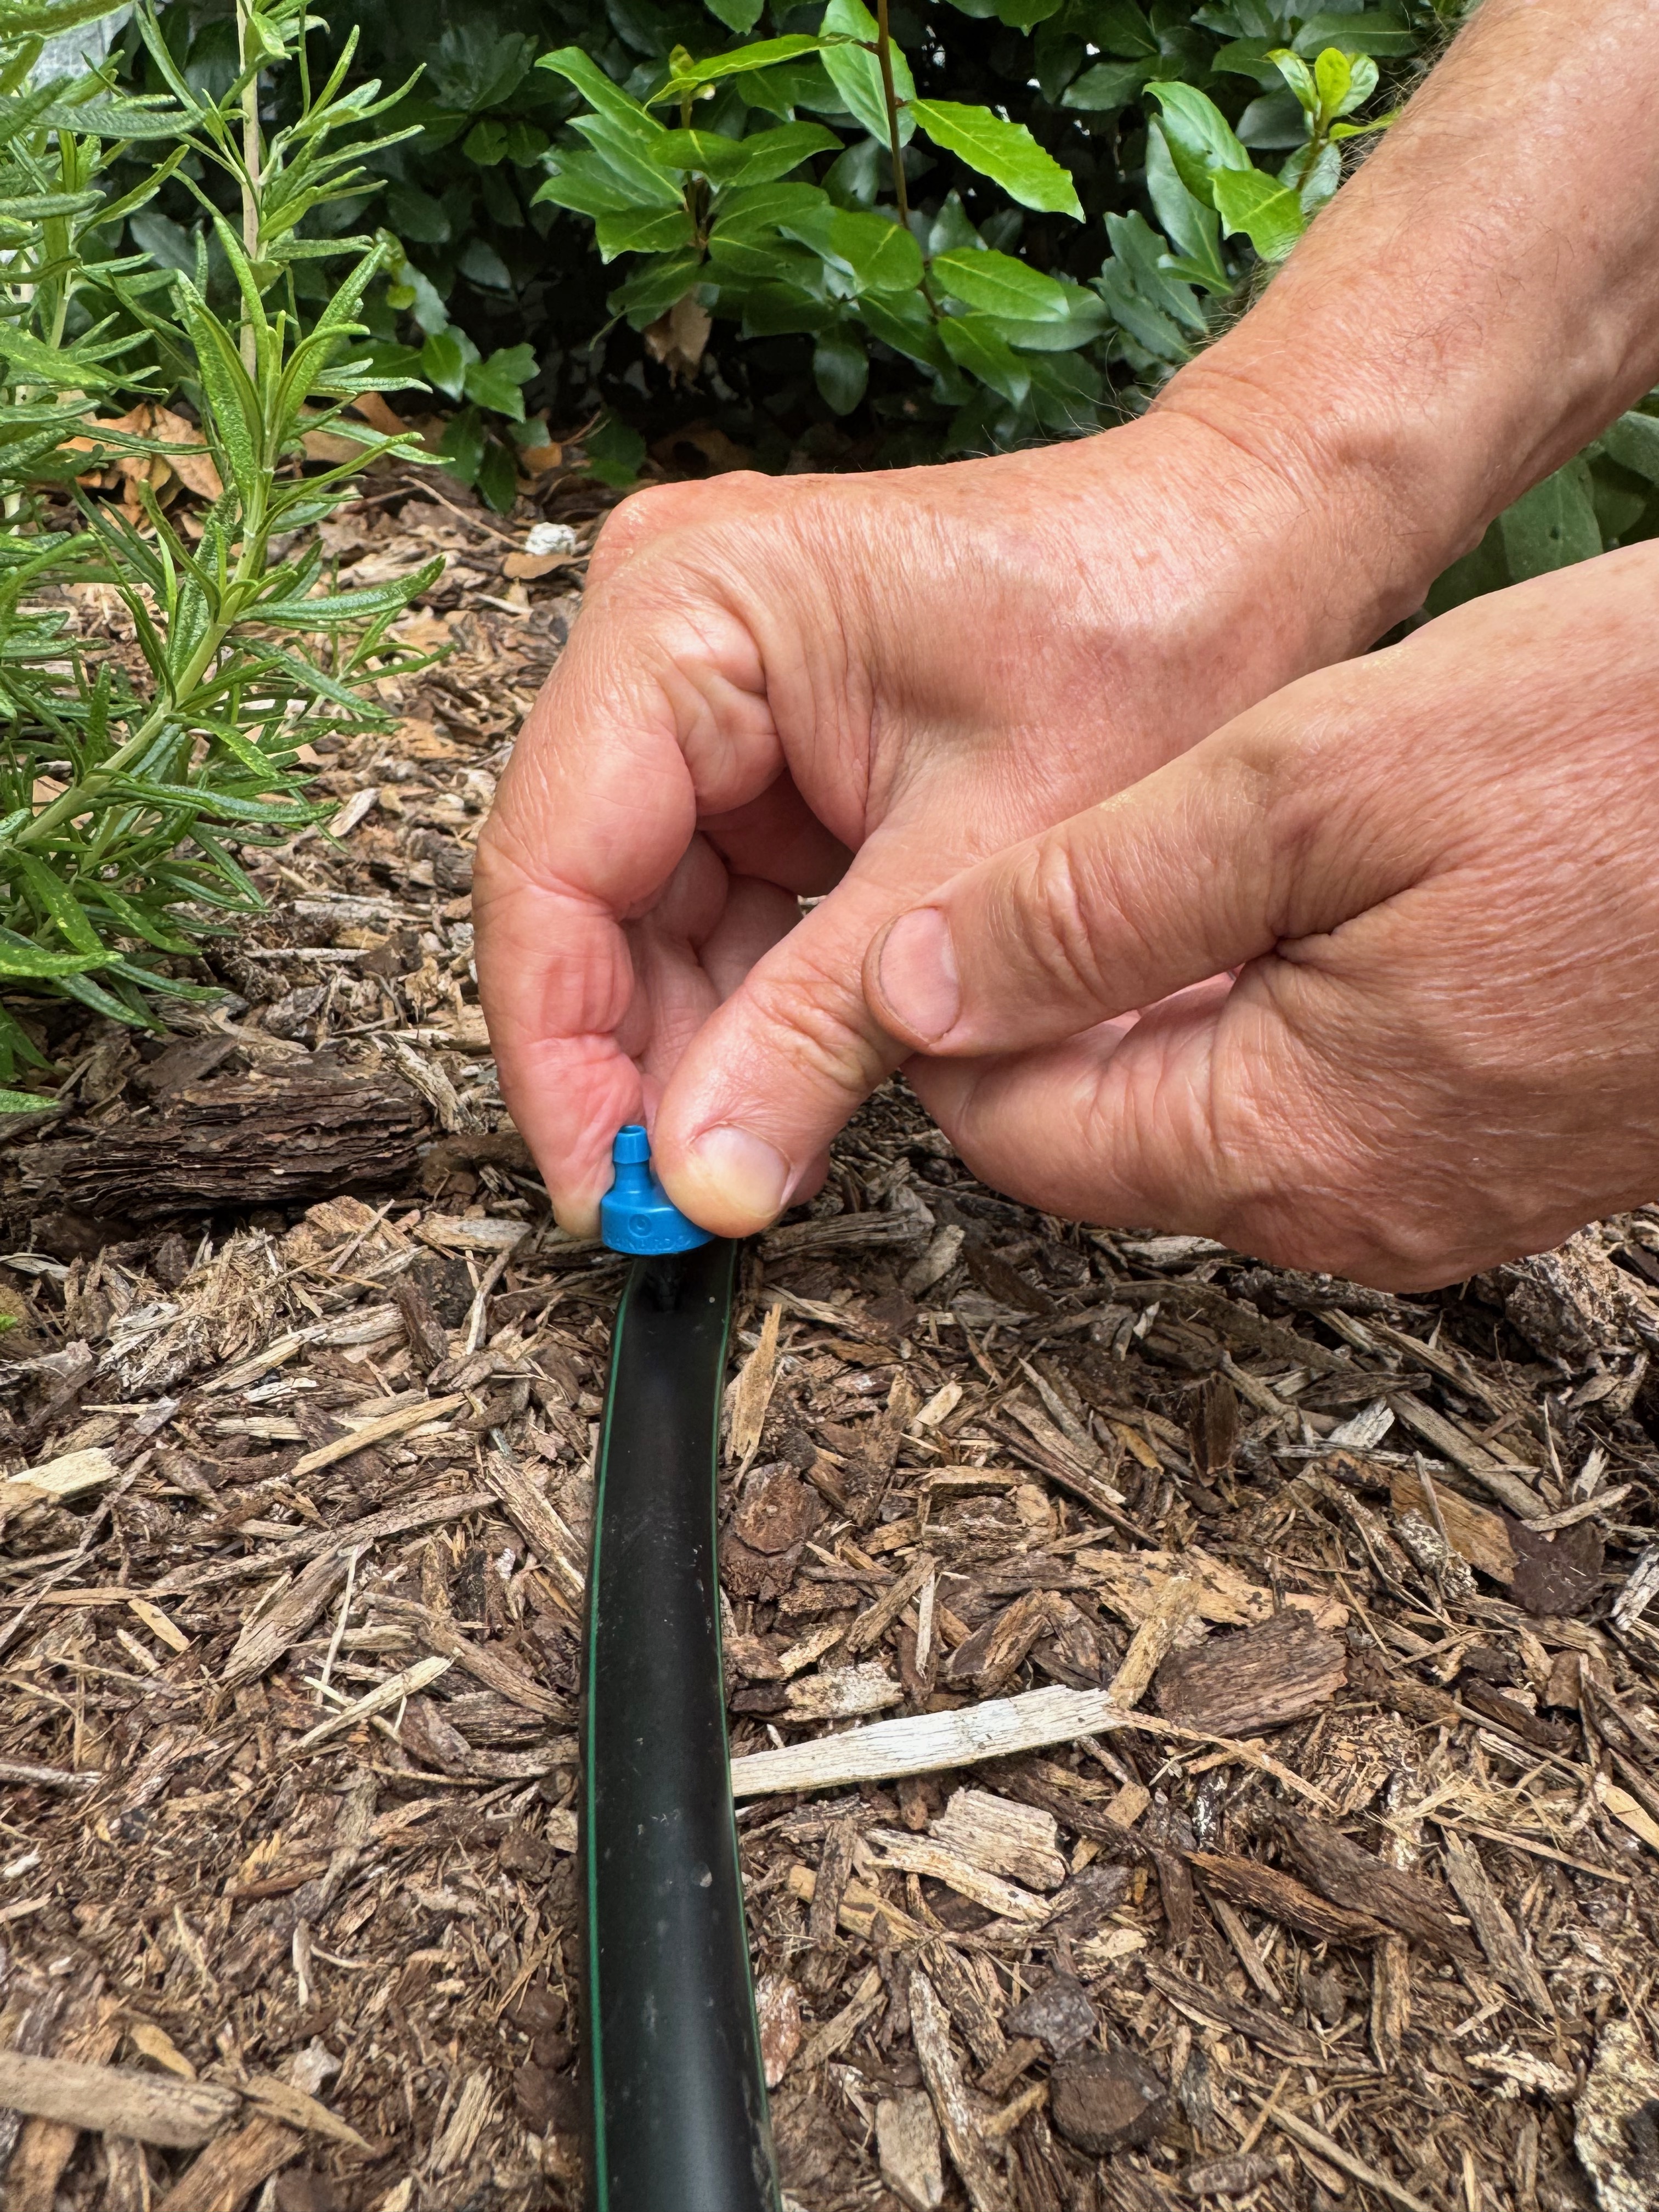
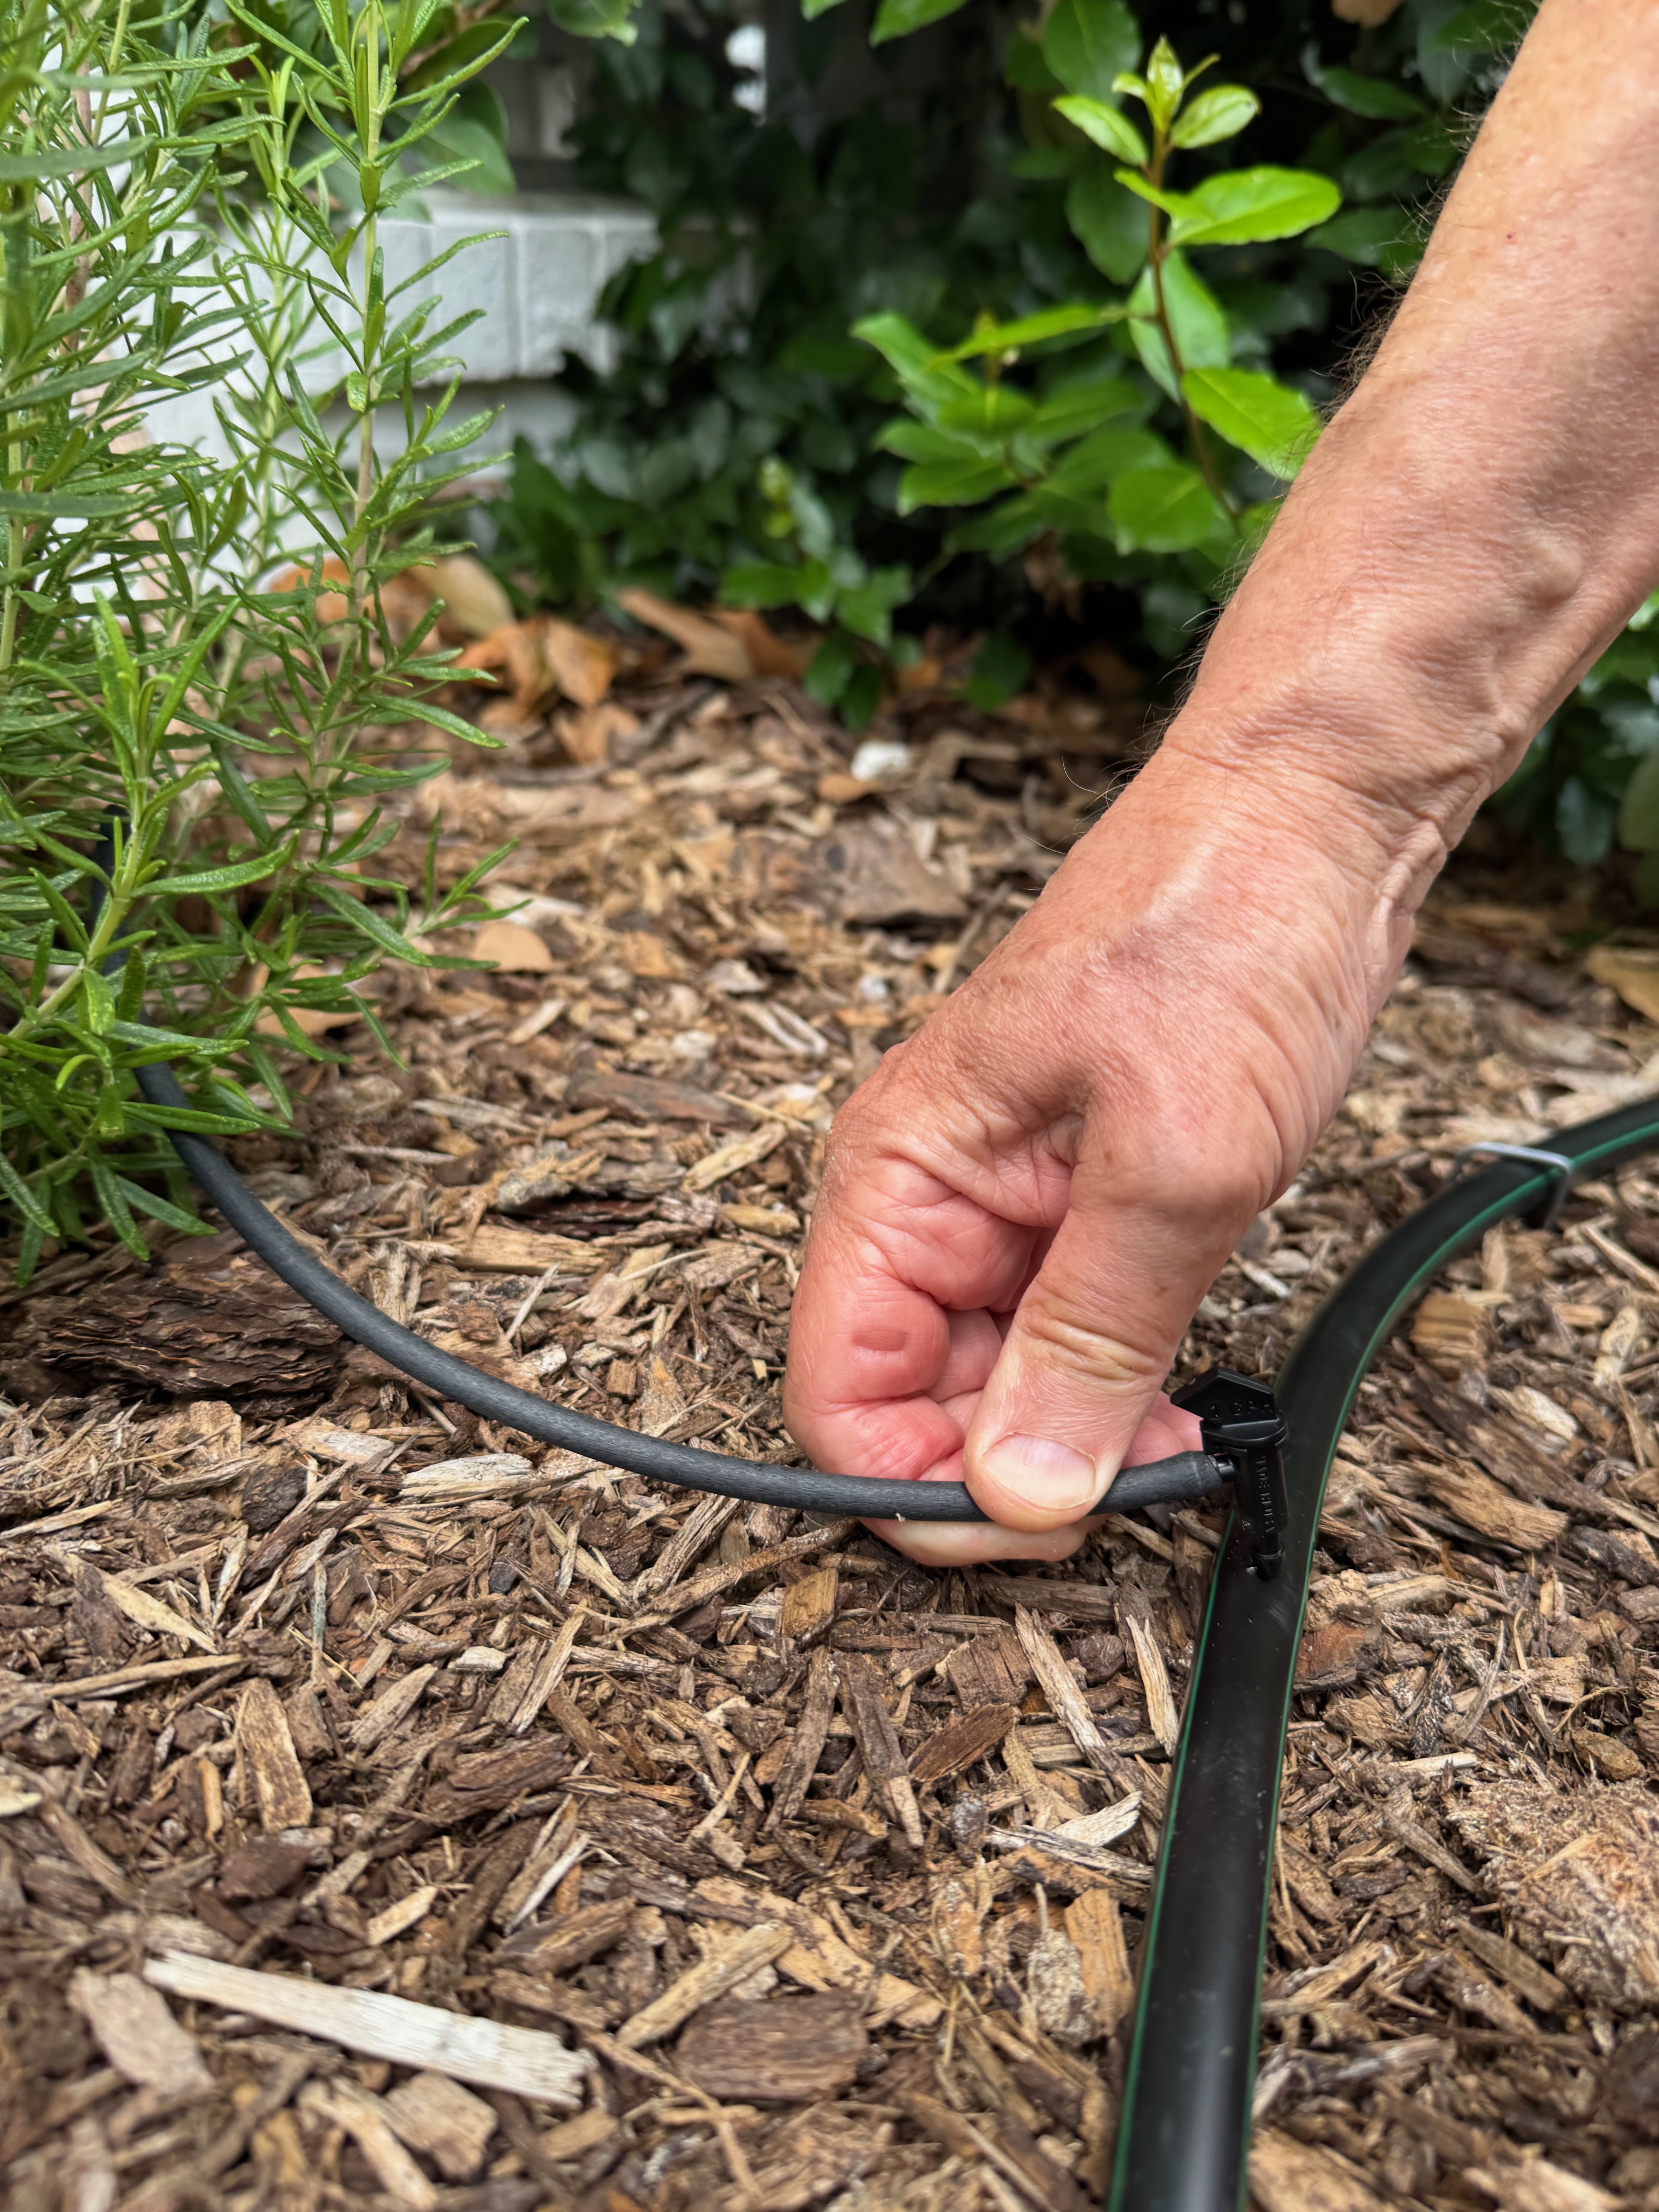
(Left and middle) Set-up process: With the awl, punching a hole in the tubing then simply inserting the proper emitter at the site of the hole. (Right) Installing a 1/4″ line with a 0.5 GPH controller for a plant farther away. (Image credit: Eric Wiebe)
A small shrub might get by with a single, 1 GPH emitter, while a 3-5’ shrub or small tree might need two 1 GPH emitters spaced 12” apart at the dripline of the plant. Note that on a sloped bed, try to place the emitters on the high side of the plant since gravity will tend to pull the soil moisture towards the plant. We run the line for these shrubs twice a week for 60-120 minutes for less frequent but deeper watering.

A 0.5 GPH emitter installed on a blank ½” line under a small perennial. (Image credit: Eric Wiebe)
Do remember that for seed germination, newly sprouted seedlings, and newly planted container plants, some hand watering will be needed until roots get established down into the wetted soil. Again, a finger or moisture meter placed at the current root zone right after the irrigation runs will let you know if water is getting to the plant roots.
Controller
While you can simply hook up your main irrigation line to an outside hose bib as you would your sprinkler, it is much more effective to use a water controller to consistently and precisely control the amount and time of watering. These controllers can run from relatively sophisticated setups that control multiple zones of watering through electronically-controlled valves, to much simpler set-ups controlling one or two lines directly off your hose bib. These controllers will typically control the day and time of the watering as well as the duration.
Many small controllers have built-in water pressure regulators and backflow preventers, otherwise you may need to buy an inexpensive in-line regulator and backflow preventer. While there is rarely a problem with sediment or algae in municipal water sources, if you are using well, pond, or reclaimed rainwater, you may need to install a filtration system to keep your emitters from clogging. If you have any concern about sediment in your water system, simply insert a 200 mesh filter along with your pressure regulator or backflow preventer.
Some controllers are wifi enabled, allowing you to control the watering schedule from a distance, monitor your local weather and delay watering after a rain, and alert you if the system is using an unusually large amount of water.


Two examples of hose-end irrigation controllers. (Image credit: Eric Wiebe)
Maintenance and Troubleshooting
As with any watering, it is important to monitor your plants. The day before the system is set to water, check for any plants wilting (signs of underwatering), while after irrigation is completed check for water pooling or running off the beds (signs of overwatering). For a wilting plant, first turn on the irrigation and check that the plant’s emitter is dripping. If it is, you may need to add another emitter, or a higher flow emitter, for that plant. A clogged emitter can simply be popped out and replaced. If you find a wet or soggy area, turn on the system and check for leaks or breaks in the line.
While a rare occurrence, it is inevitable that once a year, I either cut a line with a shovel or have a squirrel chew through a location. Luckily, repairs are quite simple. Simply cut out the damaged section with a hand pruner and use a straight coupler to splice the ends together. If the line is in good shape, you may need to either cut down on the water time, or reduce the number or the flow rate of the emitters.
While there is definitely a bit of setup time, cost, and a small amount of maintenance, the time and money saved over hand watering or moving sprinklers around is significant. More importantly, it is significantly more efficient, greatly lowering the financial and environmental cost of overwatering.
Resources and Additional Information
- For Drip Irrigation for the Home Gardeners from [CoS] Colorado State University:
- Drip Irrigation information from University of Rhode Island:
- Drip Irrigation for the Food Garden from University of California: https://ucanr.edu/sites/default/files/2025-05/204865.pdf
- Using Drip Irrigation in the Garden From Iowa State University: https://yardandgarden.extension.iastate.edu/how-to/using-drip-irrigation-garden
- For more general irrigation information, including drip irrigation, see our blog article “Sustainable Summer Gardening: Irrigation and Soil Coverage Tips:” https://wp.me/p2nIr1-4xn
Article Short Link: https://wp.me/p2nIr1-62U